In Visual Basic 2015, a string is a single unit of data that made up of
a series of characters that includes letters, digits, alphanumeric
symbols(@,#,$,%,^,&,*, etc) and more. It is treated as the String
data type and therefore it is non-numeric in nature which means it
cannot be processed mathematically, though it might consists of numbers.
Everyday life examples of strings are names, addresses, gender, cities,
book titles, phone numbers, email addresses and more.In Visual Basic
2015, you can manipulate strings by writing code to process characters
like sentences, words, text ,alphanumeric characters and more. Strings
manipulation is best illustrated in the area of word processing that
deals with text editing.
12.1 String Manipulation Using + and & signs.
In Visual Basic 2015, you can manipulate strings using the &
sign and the + sign, both perform the string concatenation which means
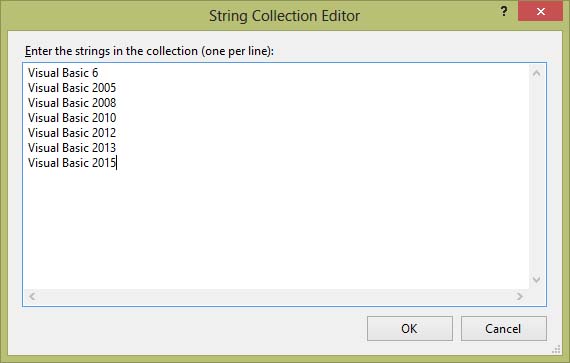
combining two or more smaller strings into larger strings. For example,
we can join “Visual” ,”Basic” and “2015″ into “Visual Basic 2015″ using
“Visual”&”Basic” or “Visual “+”Basic”, as shown in the Examples
below:
Example 12.1
Private Sub Form1_Load(sender As Object, e As EventArgs) Handles MyBase.Load
Dim str1 = “Visual “, str2 = “Basic “, str3 = “2015”, str As String
str = str1 + str2 + str3
MsgBox(str)
End Sub
The line str = str1 + str2 + str3 can be replaced by str = str1 &
str2 & str3 and produces the same output. However, if one of the
variables is declared as numeric data type, you cannot use the + sign,
you can only use the & sign.
The output is shown in Figure 12.1:
 Figure 12.1
Example 12.2
Private Sub Form1_Load(sender As Object, e As EventArgs) Handles
MyBase.LoadDim str1 = “Visual “, str2 = “Basic “, str3 = “2015”, str As
String
Dim str4 As Integer
str4 = 100
str = str1 + str2 + str3 + str4
MsgBox(str)
End Sub
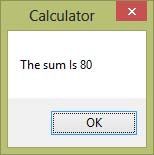
This code will produce an error because of data mismatch. The error message appears as follows:
 Figure 12.2
However, using & instead of + will fix the error as the integer will be treated as a string. The output is as follows:

Figure 12.3
12.2 String Manipulation Using Visual Basic 2015 Built-in Functions
A function is similar to a normal procedure but the main purpose of
the function is to accept a certain input and return a value which is
passed on to the main program to finish the execution.There are numerous
string manipulation functions that are built into Visual Basic 2015.
12.2 (a) The Len Function
The Len function returns an integer value which is the length of a
phrase or a sentence, including the empty spaces. The syntax is
Len (“Phrase”)
For example,
Len (Visual Basic 2015) = 17 and Len (“welcome to VB 2015 tutorial”) = 27
Example 12.3
Private Sub Button1_Click(ByVal sender As System.Object, ByVal e As System.EventArgs) Handles Button1.Click
Dim MyText as String
MyText=”Visual Basic 2015″
MsgBox(Len(MyText))
End Sub
The output:
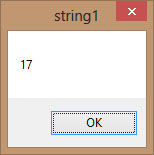
Figure 12.4
12.2(b) The Right Function
The Right function extracts the right portion of a phrase. The syntax is
Microsoft.VisualBasic.Right(“Phrase”,n)
Example 12.4
Private Sub Button1_Click(ByVal sender As System.Object, ByVal e As System.EventArgs) Handles Button1.Click
Dim MyText As String
MyText=”Visual Basic”
MsgBox(Microsoft.VisualBasic.Right(MyText, 4))
End Sub
The above program returns four right most characters of the phrase entered into the textbox.
The Output:
 Figure 12.5
12.2(c)The Left Function
The Left function extract the left portion of a phrase. The syntax is
Microsoft.VisualBasic.Left(“Phrase”,n)
Where n is the starting position from the left of the phase where the portion of the phrase is will be extracted. For example,
Microsoft.VisualBasic.Left (“Visual Basic”, 4) = Visu .
12.2 (d) The Mid Function
The Mid function is used to retrieve a part of text form a given phrase. The syntax of the Mid Function is
Mid(phrase, position,n)
where
phrase is the string from which a part of text is to be retrieved.
position is the starting position of the phrase from which the retrieving process begins.
n is the number of characters to retrieve.
Example 12.5:
Private Sub Button1_Click(sender As Object, e As EventArgs) Handles Button1.Click
Dim myPhrase As String
myPhrase = InputBox(“Enter your phrase”)
LblPhrase.Text = myPhrase
LblExtract.Text = Mid(myPhrase, 2, 6)
End Sub
* In this example, when the user clicks the button, an input box will
pop up prompting the user to enter a phrase. After a phrase is entered
and the OK button is pressed, the label will show the extracted text
starting from position 2 of the phrase and the number of characters
extracted is 6.
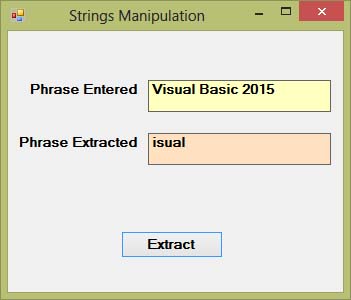
Figure 12.6
12.2(e) The Trim Function
The Trim function trims the empty spaces on both side of the phrase. The syntax is
Trim(“Phrase”)
.For example, Trim (” Visual Basic “) = Visual basic
Example 13.4
Private Sub Button1_Click(ByVal sender As System.Object, ByVal e As System.EventArgs) Handles Button1.Click
Dim myPhrase As String
myPhrase = InputBox(“Enter your phrase”)
Label1.Text = Trim(myPhrase)
End Sub
12.2(f) The Ltrim Function
The Ltrim function trims the empty spaces of the left portion of the phrase. The syntax is
Ltrim(“Phrase”)
.For example,
Ltrim (” Visual Basic 2015″)= Visual basic 2015
12.2(g)The Rtrim Function
The Rtrim function trims the empty spaces of the right portion of the phrase. The syntax is
Rtrim(“Phrase”)
.For example,
Rtrim (“Visual Basic 2015 “) = Visual Basic 2015
12.2(h) The InStr function
The InStr function looks for a phrase that is embedded within the
original phrase and returns the starting position of the embedded
phrase. The syntax is
Instr (n, original phase, embedded phrase)
Where n is the position where the Instr function will begin to look for the embedded phrase. For example
Instr(1, “Visual Basic 2015 “,”Basic”)=8
*The function returns a numeric value.
You can write a program code as shown below:
Private Sub Button1_Click(ByVal sender As System.Object, ByVal e As System.EventArgs) Handles Button1.Click
Label1.Text = InStr(1, “Visual Basic”, “Basic”)
End Sub
12.2(i) The Ucase and the Lcase Functions
The Ucase function converts all the characters of a string to capital
letters. On the other hand, the Lcase function converts all the
characters of a string to small letters.
The syntaxes are
Microsoft.VisualBasic.UCase(Phrase)
Microsoft.VisualBasic.LCase(Phrase)
For example,
Microsoft.VisualBasic.Ucase(“Visual Basic”) =VISUAL BASIC
Microsoft.VisualBasic.Lcase(“Visual Basic”) =visual basic
12.2(j)The Chr and the Asc functions
The Chr function returns the string that corresponds to an ASCII code
while the Asc function converts an ASCII character or symbol to the
corresponding ASCII code. ASCII stands for “American Standard Code for
Information Interchange”. Altogether there are 255 ASCII codes and as
many ASCII characters. Some of the characters may not be displayed as
they may represent some actions such as the pressing of a key or produce
a beep sound. The syntax of the Chr function is
Chr(charcode)
and the format of the Asc function is
Asc(Character)
The following are some examples:
Chr(65)=A, Chr(122)=z, Chr(37)=% ,
Asc(“B”)=66, Asc(“&”)=38
* We shall learn more about functions in later lessons