Tuesday, July 5, 2016

Visual Basic 2015 Lesson 16: Understanding Sub Procedures

A procedure is a program code that can carry out certain tasks or return a value. It can be called from other procedures. In Visual Basic 2015, there are two types of procedures;  sub procedures and functions. A sub procedure(also call subroutine) is a procedure that performs a specific task and does not return a value while a function is a procedure that returns a value. We will learn about function in next lesson. A sub procedure is usually used to accept input from the user, display information, print information, manipulate properties or perform some other tasks. It is a program code by itself and it is not an event procedure because it is not associated with a runtime procedure . It is called by other code whenever it is required to perform a certain task.


Sub procedures help to make programs smaller and easier to manage. A sub procedure begins with a Sub keyword and ends with an End Sub keyword. The program structure of a sub procedure is as follows:
Sub ProcedureName (parameter)
Statements
End Sub
The parameter is a certain data that is passed into the sub procedure to perform a specified task.
Example 16.1
In this example, we create a sub procedure to sum up two values that are specified as the parameters. The main program can reference a procedure by using its name together with the parameters in the parentheses.
Private Sub Form1_Load(sender As Object, e As EventArgs) Handles MyBase.Load
sum(5, 6)
End Sub Sub sum(a As Single, b As Single)
MsgBox(“sum=”& a + b)
End Sub
Running the program produces a message box
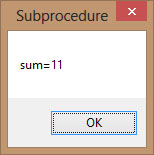
vb2013_figure11.1
Figure 16.1

Example 16.2: Password Cracker

This is Visual Basic 2015 program that demonstrates how to crack passwords. It can generate possible passwords and compare each of them with the actual password; and if the generated password found to be equal to the actual password, login will be successful.
In this program, a timer is inserted into the form and it is used to do a repetitive job of generating the passwords.We create a  passwords generating procedure generate () and it is called by the e Timer1_Tick() event so that the procedure is repeated after every interval. The interval of the timer can be set in its properties window. A value of 1 is 1 millisecond and  a value of 1000 is 1 second. We shall set the Timer’s interval at 100 which is equivalent to 0.1 second. The Timer1.Enabled property is set to false so that the program will only start generating the passwords after the user clicks on the Generate button. Rnd is a Visual Basic 2015 function that generates a random number between 0 and 1. Multiplying Rnd by 100 will produce a number between 0 and 100. Int is a Visual Basic 2015 function that returns an integer by ignoring the decimal part of that number.


Therefore, Int(Rnd*100) will produce a number between 0 and 99, and the value of Int(Rnd*100)+100 will produce a number between 100 and 199.Finally, the program uses If…Then…Else to check whether the generated password is equal the actual password or not. If they are equal, the passwords generating process will be terminated by setting the Timer1.Enabled property to false.
The Code
Public Class Form1
Dim password As Integer Dim crackpass As Integer
Private Sub Button1_Click(sender As Object, e As EventArgs) Handles Button1.Click
Timer1.Enabled = True
End Sub
Private Sub Timer1_Tick(sender As Object, e As EventArgs) Handles Timer1.Tick
generate()
If crackpass = password Then
Timer1.Enabled = False
Label1.Text = crackpass
MsgBox(“Password Cracked!Login Successful!”)
Else Label1.Text = crackpass
Label2.Text = “Please wait…”
End If
End Sub
Sub generate()
crackpass = Int(Rnd() * 100) + 100
End Sub
Private Sub Form1_Load(sender As Object, e As EventArgs) Handles MyBase.Load
password = 123
End Sub
End Class
The output
vb2013_figure16.2
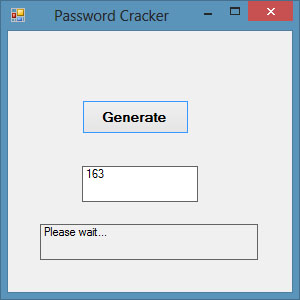
Figure 16.2: Password Generating Phase
vb2013_figure16.3
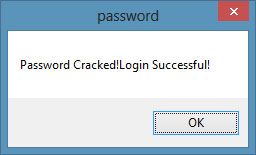
Figure 16.3: Message Showing Successful Login

Visual Basic 2015 Lesson 15: Looping for Repetitive Jobs

In Visual Basic 2015, looping is a process that involves a  procedure that runs repetitively until a certain condition is met. For example, we can design a program that adds a series of numbers until the sum exceeds a certain value, or a program that asks the user to enter data repeatedly until he or she enters the word ‘Finish’.  There are three types of Loops in Visual Basic 2015,  namely the For…..Next loop, the Do loop and the While…..End While loop

15.1 For….Next Loop

In Visual Basic 2015 , the structure of a For…Next loop is as shown below:


For counter=startNumber to endNumber (Step increment)
One or more Visual Basic 2015 statements
Next

In order to exit a For…..Next Loop, you need to place the Exit For statement within the loop. It is normally used together with the If….Then statement. For its application, you can refer to example 15.1 d.
Example 15.1 a
Dim counter as Integer
For counter=1 to 10
ListBox1.Items.Add (counter)
Next
* The program will enter number 1 to 10 into the list box.

Example 15.1b

The following program will calculate the sum of the numbers 0+10+20+30+40+……+100
Dim counter , sum As Integer
For counter=1 to 100 step 10
sum+=counter
ListBox1.Items.Add (sum)
Next


Example 15.1c

This program will compute a series of subtractions as follow:
1000-100-95-90-………-5. In this case  increment is negative.
Dim counter, sum As Integer
sum = 1000
For counter = 100 To 5 Step -5
sum – = counter
ListBox1.Items.Add(sum)
Next

Example 15.1d

This program uses Exit …For to escape the loop  when n is greater than 6.
Dim n as Integer
For n=1 to 10
If n>6 then
Exit For
End If
Else
ListBox1.Items.Add ( n)
Next
End If
Next

15.2 Do Loop

In Visual Basic 2015, there are several  Do Loop structures, as shown below:
a) Do While condition
Block of one or more Visual Basic 2015 statements
Loop
b) Do
Block of one or more Visual Basic 2015 statements
Loop While condition
c) Do Until condition
Block of one or more Visual Basic 2012 statements
Loop
d) Do
Block of one or more Visual Basic 2015 statements
Loop Until condition
* Exiting the Loop
We can also use Exit Do to escape the loop.
Let’ s examine the following examples:

Example 15.2(a)

In this example, the procedure will keep on adding the initial number by 1 until  it exceeds 1000.
Do while counter <=1000
TextBox1.Text=counter
counter +=1
Loop
We can rewrite the procedure above and achieve the same result. The code is shown as follows:
Do
TextBox1.Text=counter
counter+=1
Loop until counter>1000

Example 15.2(b)

In this example, the procedure will keep on adding a number by 1 and display the results in a list box. The process stops when it has repeated 100 times.
Private Sub Button1_Click(ByVal sender As System.Object, ByVal e As System.EventArgs) Handles Button1.Click
Dim sum, n As Integer
ListBox1.Items.Add(“n” & vbTab & “Sum”)
ListBox1.Items.Add(“———————-”)
Do
n += 1
sum += n
ListBox1.Items.Add(n & vbTab & sum)
If n = 100 Then
Exit Do
End If
Loop
End Sub
* The loop in the above example can be replaced by the following loop:
Do Until n = 10
n += 1
sum += n
ListBox1.Items.Add(n & vbTab & sum)
Loop
The output is as shown in Figure 15.1
vb2013_figure15.1
                                              Figure 15.1

15.3 While….End While Loop

In Visual Basic 2015, the structure of a While….End While Loop is very similar to the Do Loop. it takes the following form:
While conditions
Visual Basic 2015 statements
End While
Example 15.3
Private Sub Button1_Click(sender As Object, e As EventArgs) Handles Button1.Click
Dim sum, n As Integer
ListBox1.Items.Add(“n” & vbTab & “sum”)
ListBox1.Items.Add(“———————-“)
While n <> 10
n += 1
sum += n
ListBox1.Items.Add(n & vbTab & sum)
End While
End Sub

Visual Basic 2015 Lesson 14: Dealing with Multiple Choices Using Select Case

In this lesson, you shall learn how to use the Select Case control structure in Visual Basic 2015  . The Select Case control structure also involves decisions making but it slightly different from the If….ElseIf control structure . The If … Then…ElseIf statement control structure evaluates only one expression but  each ElseIf statement  computes different values for the expression. On the other hand, the Select Case control structure evaluates one expression  for multiple values. Select Case is preferred when there exist multiple conditions as using If…Then..ElseIf statements will become too messy.


14.1 The Select Case…End Select Structure
The structure of the Select Case control structure in Visual Basic 2015 is as follows:
Select Case expressionCase value1
Block of one or more Visual Basic 2015 statements
Case value2
Block of one or more Visual Basic 2015 Statements
Case value3
.
.
Case Else
Block of one or more Visual Basic 2015 StatementsEnd Select
14.2 The usage of Select Case is shown in the following examples
Example 14.1: Examination Grades
In this example, the program will display a message associated with the grade entered by the user.
The CodePrivate Sub BtnShow_Click(sender As Object, e As EventArgs) Handles BtnShow.Click
Dim grade As String
grade = TxtGrade.Text
Select Case grade
Case “A”
MsgBox(”High Distinction”)
Case “A-”
MsgBox(”Distinction”)
Case “B”
MsgBox(”Credit”)
Case “C”
MsgBox(”Pass”)
Case Else
MsgBox(”Fail”)End Select
End Sub
The Output
vb2015_fig14.1
 Figure 14.1


vb2015_fig14.2
Figure 14.2

Example 14.2

In this example, you can use the keyword Is together with the comparison operators to evaluate an expression.
Private Sub Button1_Click(ByVal sender As System.Object, ByVal e As System.EventArgs) Handles Button1.Click’Examination Marks
Dim mark As Single
mark = mrk.Text
Select Case mark
Case Is >= 85
MsgBox( “Excellence”)
Case Is >= 70
MsgBox( “Good”)
Case Is >= 60
MsgBox( “Above Average”)
Case Is >= 50
MsgBox( “Average”)
Case Else
MsgBox( “Need to work harder”)
End Select
End Sub
Example 14.3
Example 14.2 can be rewritten as follows:
Private Sub Button1_Click(ByVal sender As System.Object, ByVal e As System.EventArgs) Handles Button1.Click
‘Examination Marks
Dim mark As Single
mark = Textbox1.Text
Select Case mark
Case 0 to 49
MsgBox( “Need to work harder”)
Case 50 to 59
MsgBox( “Average” )
Case 60 to 69
MsgBox( “Above Average”)
Case 70 to 84
MsgBox( “Good”)
Case 85 to 100
MsgBox(“Excellence”)
Case Else
MsgBox( “Wrong entry, please reenter the mark”)
End Select
End Sub
Example 14.4
Grades in high school are usually presented with a single capital letter such as A, B, C, D or E. The grades can be computed as follow:
Private Sub Button1_Click(ByVal sender As System.Object, ByVal e As System.EventArgs) Handles Button1.Click
‘Examination Marks
Dim mark As Single
mark = TextBox1.Text
Select Case mark
Case 0 To 49
LblGrade.Text = “E”
Case 50 To 59
LblGrade.Text = “D”
Case 60 To 69
LblGrade.Text = “C”
Case 70 To 79
LblGrade.Text = “B”
Case 80 To 100
LblGrade.Text = “A”
Case Else
LblGrade.Text = “Error, please re-enter the mark”
End Select
End Sub
The output:

Figure 14.3